Using the nanoVNA
The Bridge12 SCN is delivered with the nanoVNA, a pocket-size vector network analyzer (VNA) to tune the probe to the transmitter frequency of the spectrometer.
The nanoVNA has two channel and has many different ways to display the (complex) S parameters. However, in the following we provide a brief set of instructions to setup the nanoVNA display to:
- Only show the reflected power from the probe (S11)
- How to calibrate the nanoVNA.
The nanoVNA will store these settings, so you only have to go once through these instructions.
For a complete reference please visit the nanoVNA Webpage.
Note
To navigate through the different menus of the nanoVNA you can either use the wheel located at the top of the device or using the touch screen. The touch screen is best used with a stylus pen.
Setting up the Display
To setup the display:
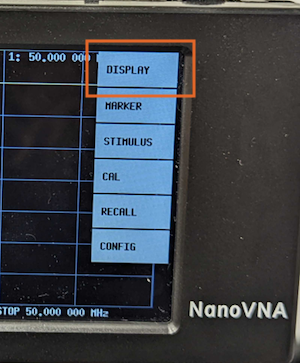
- Tap the touchscreen to show the menu
- Tap the Display button (top right corner)
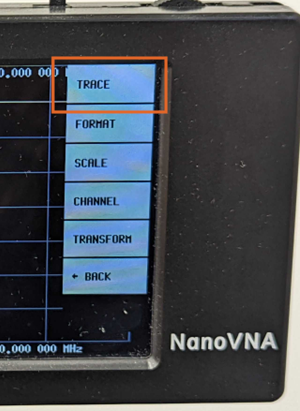
- Tap the Trace button on the display
- For convenience, select only Trace 0 by tapping on it. The selected trace is highlighted with a colored background (yellow for Trace 0). Unselect any other traces by tapping on the button.
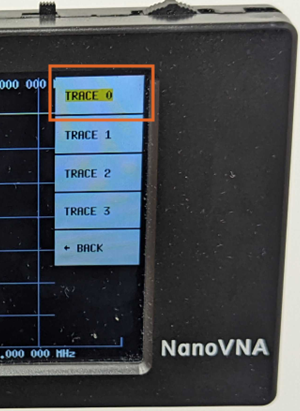
- To leave the menu tap somewhere on the touchscreen.
Setting the Frequency Range
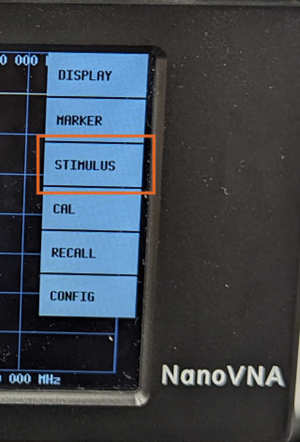
- Tap on the touchscreen to show the menu
- Tap on the Stimulus button
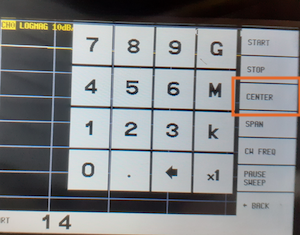
- Next, tap the Center button
- On the next screen, enter the spectrometer frequency using the number pad and press the M button to indicate that the entered frequency is given in MHz.
- Next, tap the Span button and enter the frequency range to observe the resonator tuning dip. Typically 1-2 MHz is a good range to start with.
Calibrating the nanoVNA
Important
The nanoVNA should be calibrated frequently. The calibration is only valid for a given set of parameters (e.g. span, center frequency, number of points ….). If one of these parameters is changed, the device needs to be recalibrated.
The device will still work even with a calibration that is “slightly off”. For example, the spectrometer frequency will not change drastically on a day to day basis and using the same configuration is ok. However, if you require accurate values for S11 we recommend calibrating the device before taking the measurement.
We recommend calibrating the device once and then not changing the measurement parameters. This should be good for a day-to-day operation.
The nanoVNA is calibrated using a basic OPEN-SHORT-LOAD protocol. Three SMA connectors are included with the nanoVNA, used for calibrating the device (see image below).
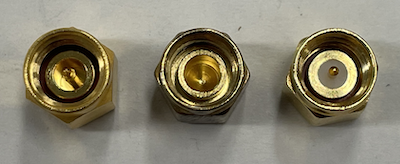
- SHORT - Left, used to shorten the input of the VNA. This connector is all metal on the inside.
- OPEN - Middle, used to create an open port. This connector does not have a middle pin.
- LOAD - Right, used to simulate a 50 Ω load. This connector has a middle pin and a white teflon ring around it.
To calibrate the nanoVNA:
- Set the center frequency and span to the desired range by following the instructions above.
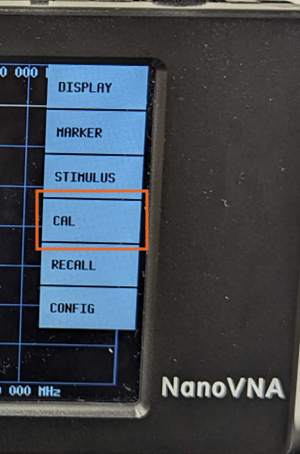
- Tab the Cal button on the display
- Connect the OPEN standard to the CH0 port and press ‘Open’
- The open entry is now black underlined
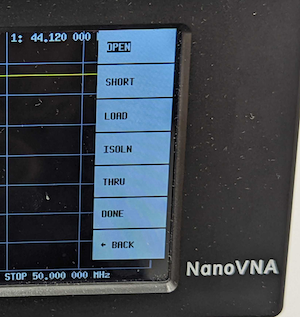
- Connect the SHORT standard to the CH0 port and press ‘Short’
- Connect the LOAD standard to the CH0 port and press ‘Load’
- Press ‘Done’
The nanoVNA is now calibrated.
Charging the Battery of the nanoVNA
From time to time the nanoVNA battery needs to be recharged.
To recharge the battery connect an USB-C cable to the nanoVNA and plug the cable either into a USB charger or a computer.