Connecting the Probe to the EPR Bridge
Connection to the EPR Bridge
Important
Please make yourself familiar with the instructions below before attempting to install the probe. At no point should you use any force during the installation process. In general, all threads, screws, etc. are imperial size, not metric. Please use the appropriate tools to fasten screws.
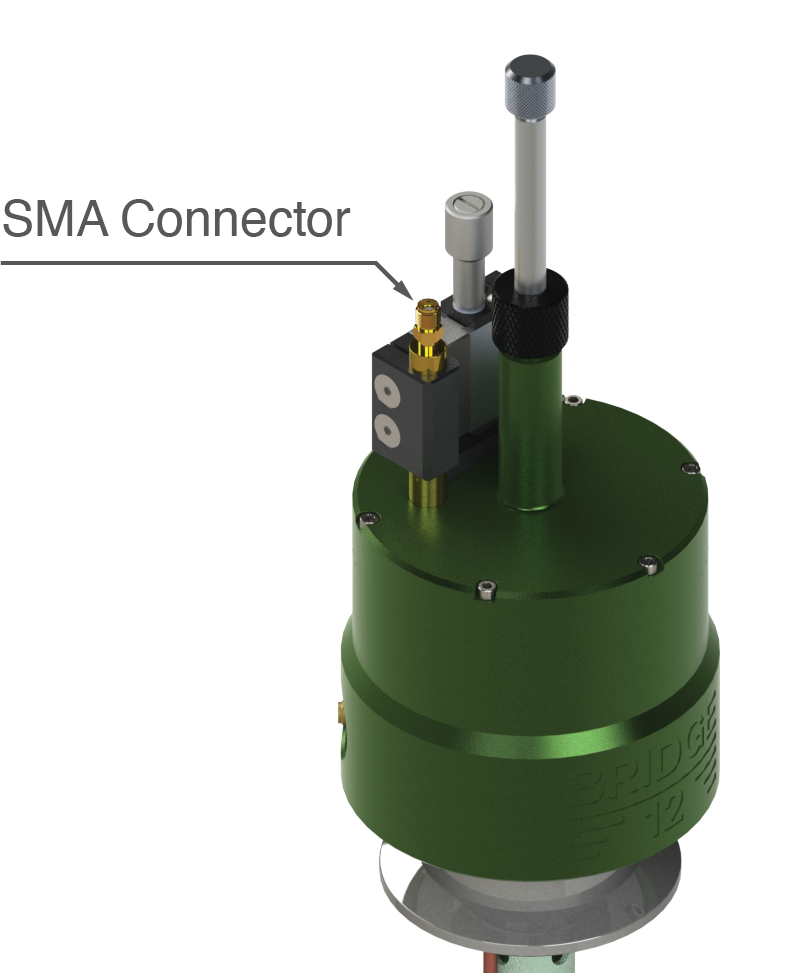
Bridge12 XLP Overview
The Bridge12 XLP has a single SMA port to connect the probe to the spectrometer (see figure above). The SMA port is located at the top of the probe. Since the iris coupling is adjusting by moving the coupling loop inside the resonator up and down, we suggest using a flexible SMA cable between the bridge and the probe.
To connect the probe to the spectrometer follow these steps:
- Remove plastic cover from SMA connector (typically used for shipping or long-term storage of the probe).
- Place probe inside cryostat. If you don’t use a cryostat, place probe in the appropriate support structure.
- Turn/orient the probe so the SMA connector and translation stage is pointing to the back and the Bridge12 logo is facing the front. Typically, the EPR bridge is located on the left.
- Connect a flexible SMA cable between the EPR bridge and the probe. If your EPR bridge was a WR-90 waveguide port (this will be the case with most older bridges) you first need to connect a WR-90 to SMA adapter.
- Tighten the SMA connections with your fingers. Ideally, you should use an SMA torque wrench. Do not use pliers to tighten the connection.
- Connect the temperature sensor to the temperature controller.
Warning
Do not use force to tighten the SMA connector. Do not use pliers or regular wrenches to tighten the SMA connection. We recommend using a torque wrench when tightening SMA connections. Torque wrenches for SMA connections are available from DigiKey or Mouser. If you don’t have a torque wrench available please just use your fingers to tighten the connection. Using the wrong tools can lead to permanent damages of the probe.
What’s next?
- Learn about Inserting the Sample.